**These posts often contain affiliate links. Please see our disclosure policy for details.**
With sites like Craigslist and Ebay, Facebook Garage Sales, Instagram pop up shops, and the vast number of direct marketing and MLM businesses, there are people selling things all over the internet and social media.
Many of these people don’t own a business; they are simply selling unwanted items online for extra cash. And if they do have a business selling a product, they’re usually not a professional photographer.
Often, when people are selling things online, the photos are snapshots that don’t properly showcase their items.
However, we live in a visual world.
Photography is as important as it’s ever been. Photos matter.
Good photography helps your products or items get noticed.
Good photos help them sell. It also helps you get the best price for whatever you’re selling.
Taking good product photos can help you sell things on something as simple as a Facebook Garage Sale or Craigslist. And good photos are crucial for Ebay or Etsy success.
The best part is it’s really not all that hard to do.
You don’t need a fancy DSLR camera. (Although that will only help your photos if you do have one.)
You don’t need a big backdrop and a full photography studio setup.
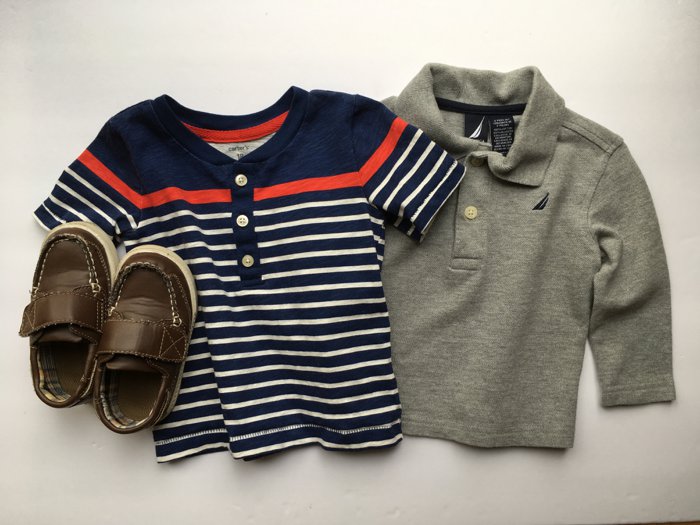
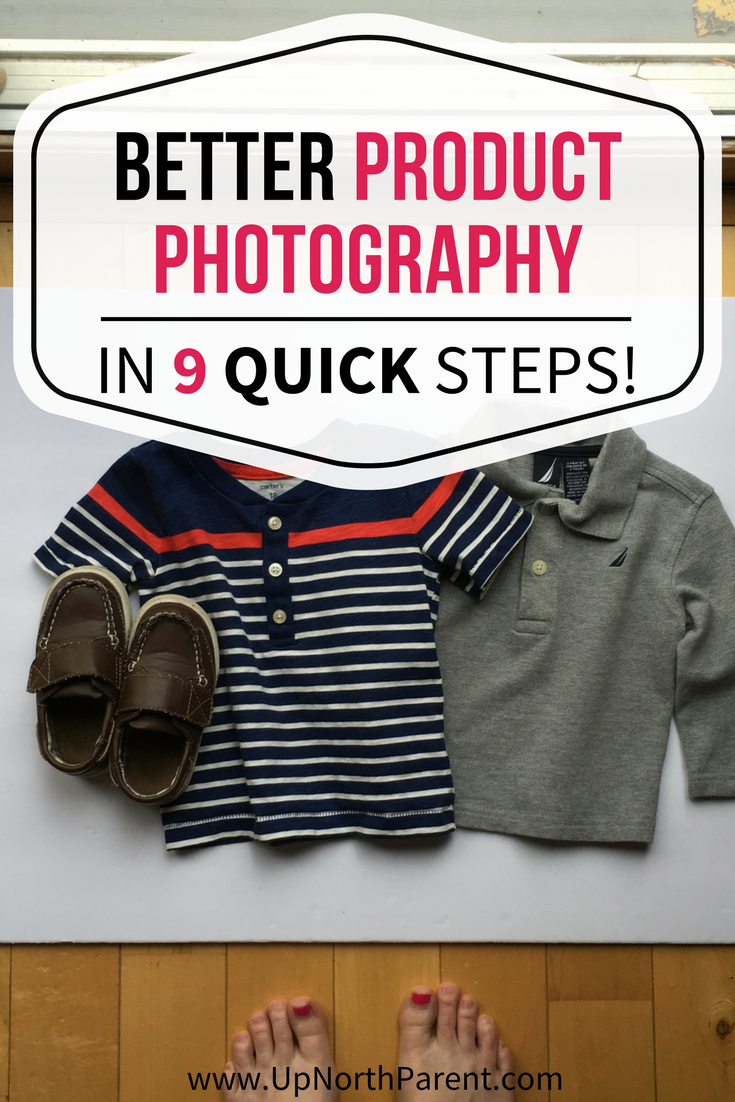
Taking better product photos so you can sell things easier is as easy as using your phone, a window, and a piece of white posterboard.
You can even get fancy and use a piece of tile, beadboard (or beadboard wallpaper), or wood as a backdrop if plain white isn’t your style. I’ve used a wooden cutting board before and it worked great!
9 Steps to Take Better Product Photos
Step 1. Gather your products.
Step 2. Get your background.
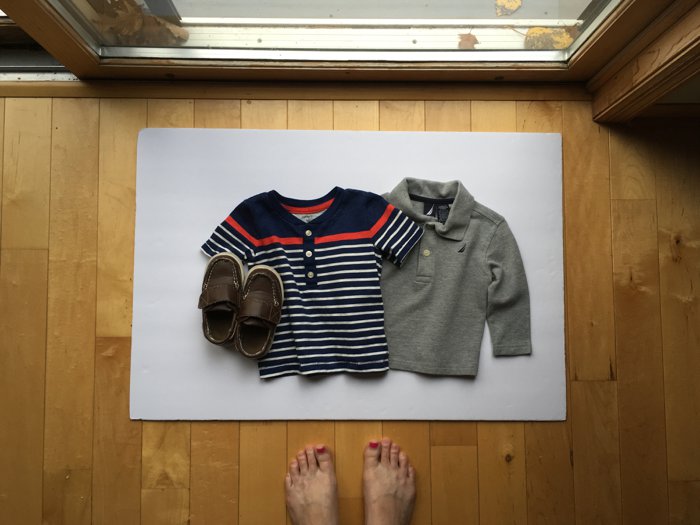
White posterboard, fabric, tile, a piece of beadboard, laminate flooring or real wood – any of these would work great as a background for product photos.
It needs to be bigger than your product with space around the edges, in order to get good photos.
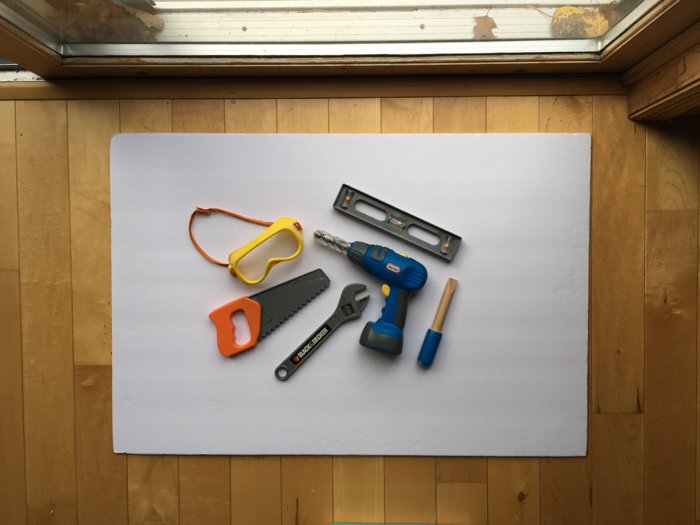
Step 3. Find your light source.
Find a window or door for your light source. You do NOT want direct sunlight. If you have big sun spots on the floor, try another window or an open outside doorway.
Direct sunlight with sunspots is an example of what you DON’T want for your photography lighting.
Spots to consider:
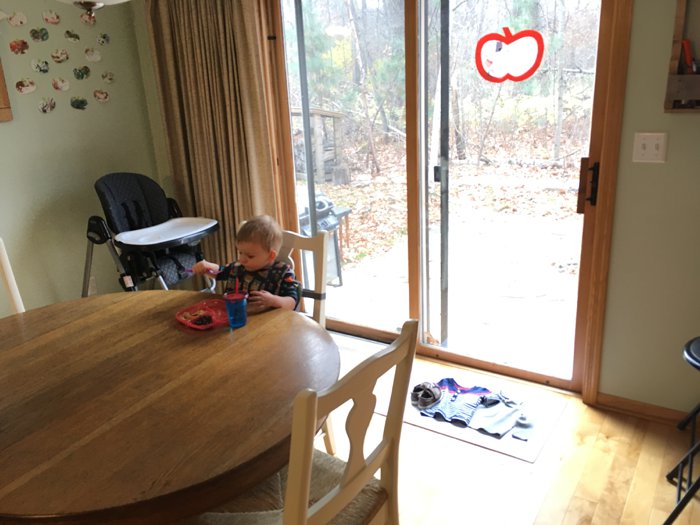
Sliding patio doors.
Open your front door and shoot in the doorway.
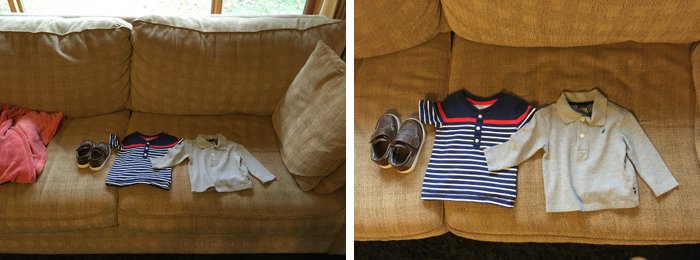
On a couch if it gets window light near it.
Put a cutting board on your sink and shoot there, if there is light coming in a window near your sink.
Be creative. Natural light from outside is THE MOST important part of this whole process.
Step 4. Turn off all indoor lighting.
You don’t want to add in artificial indoor lighting with pretty natural light from outside. The result is usually a mess.
Step 5. Lay your background down.
Step 6. Arrange your product on top of the background.
Optional Step 7. Use a reflector.
Take a second piece of white posterboard and place it on the opposite side of your product as the window to help bounce light back onto the side that is darker.
In my photo examples, the patio door is on top, so the light is coming in from the top. I could place a white piece of posterboard vertically, leaning against a chair, at the bottom of the setup, so that some of the window light would bounce into the photo and light up the section that is the furthest from the window.
Step 8. Take photos from up above! You can do this with your phone or an actual camera.
Make sure you HOLD STILL; take the photos with two hands. This minimizes camera shake and gives you the clearest photos possible. Try different angles and take more than you think you’ll need.
You can also use the self timer on your phone so that you can hold the phone with both hands and still take the photo. Every time I try to hold still with one hand while pressing the camera button with the other, I get wobbly photos.
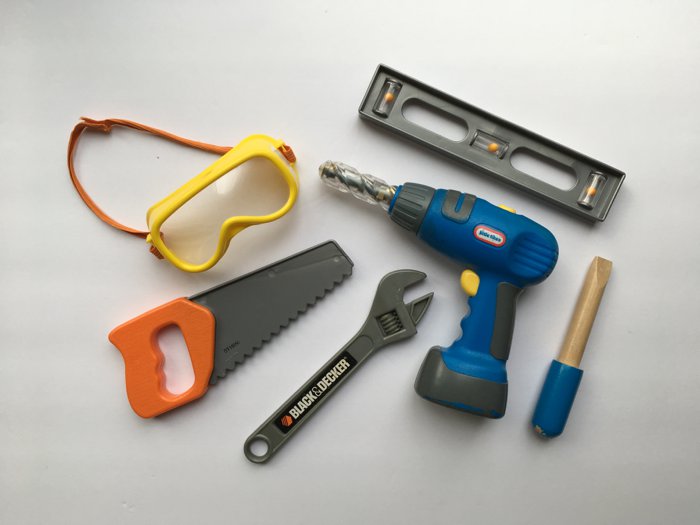
Optional Step 9. Edit the best ones.
You can use the default editing software on your phone, or use an app like A Color Story or VSCO if you want to have more editing options. Typically, most phone photos can benefit from a little contrast boost, a little sharpening, a slight increase in exposure if they’re too dark, and maybe a bit of a color shift if the color is off from indoor lighting.
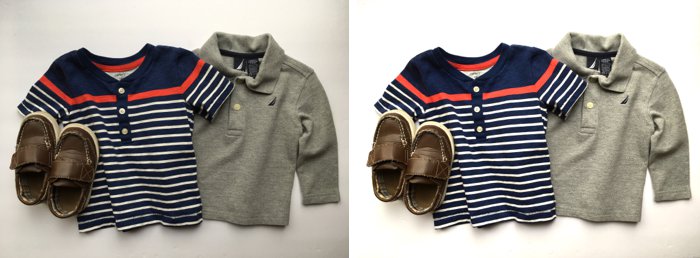
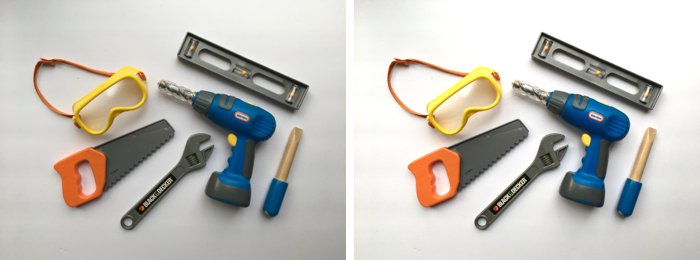
These photos were editing using the default photo editor on my iPhone SE. If I had used an app designed specifically for photo editing like VSCO or A Color Story (my current favorite app), the edits would be even better.
Remember, practice makes perfect.
Using these tips will help you take better product photos that immediately appear more professional.
These tips will help you increase interest in the items you are selling, it will help you sell them for a higher price, and it can help elevate your direct marketing business by showcasing your products in a better light as well. This applies to all of the MLM businesses out there; oils, skin care products, makeup, supplements, clothes and more.
Plus, these tips can also be used to take awesome flatlays for Instagram. All of the same rules apply!

Laura is a motherhood blogger and photographer from the Brainerd Lakes Area in Minnesota. Her mission is to seek joy in the midst of motherhood, and encourage other mamas to do the same. She is married to her high school sweetheart, Matt, a mama to their firstborn son, Raleigh, and a dog-mama to their feisty 6lb toy poodle, Remy. She spends her days chasing after them, while daydreaming about naps, crafts, and donuts with sprinkles. She writes at www.lauraradniecki.com.


These are some awesome tips! I will definitely be putting this into good use soon. Thank you! 🙂
You are welcome, Jane! Thanks for stopping by!
Hello,
Thank you so much for your valuable information for me and I am very happy to found your article